Monday, December 19, 2016

FIFTH GRADE . . . Happy Holidays!

Ornament by Claire

These are few of our ornament sketches the fifth grade artists presented this week in art class. They were asked to draw an ornament that celebrates their traditions at home. It could symbolize a holiday or represent their love for the winter season.

Happy holidays to all of our Lower School families!


Ornament by Dylan

Ornament by Lindsay

Ornament by Sophia

Ornament by Shaya
Ornament by Matteo
Ornament by Crosby

Friday, December 16, 2016

BEGINNERS . . . Bring on the snow!


Snowman by Logan

Beginners are continuing to become more confident artists, drawing and painting circles. Our snowmen paintings began with three large circles painted with a big brush and white paint. We added paper hats, scarves with fringes, and carrot-shaped noses. These young artists also added twigs for arms, a face and buttons going down the front of their well-dressed but very cold friends. Happy winter everyone!

To see all of our snowmen paintings, visit our portfolios at artsonia.com ...
http://www.artsonia.com/schools/school.asp?id=114839

Snowman by Aaliya

Snowman by Henry
Snowman by David

SECOND GRADE . . . A still life arrangement

Still life by Juily

Second graders completed their still life studies in art class. We created an arrangement of round objects on a table and many of the students added colorful tablecloths with an interesting background too.

Every round object we created began with a circle or an oval. The top of a vase or a bowl looks like a circle when you look straight down at the object, but when it is placed on an table and you see it from a distance, the top circle appears more as an oval. Even the bottom line of the vase appears to have the same curve as the oval at the top. Understanding how to represent a round object on paper helps us to better see the form. Once we created an interesting arrangement with overlapping objects and added in the details of our fruit, the table and the background, we had fun coloring in our scenes.

Here are a few more wonderful examples of our still life drawings. You can see everyone's work by following this link to artsonia.com.     http://www.artsonia.com/schools/school.asp?id=114839


Still Life by Brooks

Still Life by Ava

Still Life by Brooke

Still Life by Cash
Still Life by Lexi

Note to families...
This art blog will be updated regularly with new posts sharing our daily activities in the art room and news about upcoming art exhibits. To respect the privacy of our students, names will always be limited to first name only and identifiable photos will never be accompanied with a name. If you have any questions or comments, please feel free to write in the comment box below or send me an email at blevine@ranneyschool.org. I would love to hear from you!
    In my class, students are given the chance to explore different materials and fun new techniques as they develop their signature style. Some young artists love to draw with a pencil, some like to paint on canvas or create images in a digital format, while others prefer working with clay and molding three-dimensional forms. In my classroom, we use a variety of materials allowing all artists to experiment and figure out which type of art they like the best. At Ranney School, we place a strong emphasis on originality and celebrate artistic differences, always nurturing and encouraging the imagination of every student.
     Remember to check out our display of finished artwork and student portfolios in the Ranney home page of Artsonia.com.  http://www.artsonia.com/schools/school.asp?id=114839


Wednesday, December 14, 2016

KINDERGARTEN . . .Painting like Eric Carle


Many of our students in Kindergarten are familiar with the illustrations and stories of Eric Carle books. “The Very Hungry Caterpillar” and “Brown Bear, Brown Bear, What do you See?” are two examples of his popular stories. Eric Carle’s “The Artist who Painted a Blue Horse,” is the book we are using as inspiration for our newest project.

Eric Carle created his illustrations as a collage of cut, painted papers.  To do our project, we looked carefully at the color wheel in the art room. If we want to paint with more than one color, as Eric Carle did with his blue horse (there are strokes of purple in his blue horse!), it helps to choose two colors close to each other on the color wheel. Yellow and orange would work together, as would blue and green. Any color painted with white is another option. And if two primary colors mix together, such as yellow and blue, we will also have a secondary color (in this case, green) where the two colors blend together.

Our painted papers turned out as beautiful paintings and they deserve to be shown off before they are turned into animals! Abstract artists work hard to achieve this level of beauty and design with just a few brush strokes. After the holidays, we will be cutting our animal shapes out of our painted papers and painting a background for the scenes. Here are a few examples of our work in progress...

Painting by Andrew
Painting by Ayla

Painting by Ben

Painting by Christo

Painting by Holden

Painting by Katya


PRE-KINDERGARTEN . . . Our colorful forests

Forest scene by Matthew
The autumn sky is always filled with such brilliant colors and we filled our wonderful forest scenes with so many colors! The background is painted with just primary colors, but we were able to also create lovely shades of green, orange, and purple everywhere the watercolors blended together. To create the bark for the trees we drew random lines on brown paper and then cut the paper into strips. We are still learning how to control our scissors properly and any irregularly cut edges made for the most realistic looking trees! The adorable animals were drawn separately and then the entire scene was glued together as a collage.

Here are a few more examples of our artwork. To see all of our forests, check out our home page of artsonia.com with this link...    http://www.artsonia.com/schools/school.asp?id=114839

Forest by Maya

Forest by Oliver

Forest by Lily

Forest by Lila

Friday, December 9, 2016

FIFTH GRADE . . . Let it snow!

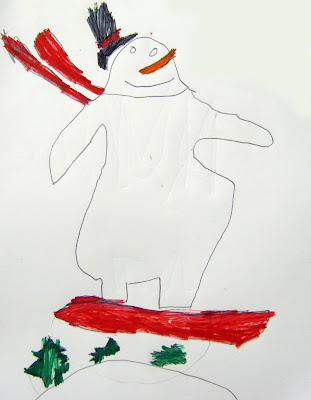
This week in our sketchpads, we drew an animated snowman with our personalities! Here are a few that might make you smile and perhaps not mind the cold weather so much...


Sketch by Balkan

Sketch by Lindsay

Sketch by Jason

Sketch by Matteo

Sketch by Maddie


LEGO CORNER!

A favorite part of our art room class is learning how to express our creative ideas through independent activities. Drawing on our own, manipulating images on the ipad, and building temporary 3D sculptures with blocks are all part of the creative experience.

Our new Lego corner has a wonderful Lego wall, made out of mounted base plates. Now our artists can also create pictures with the colorful blocks and stand back to see how they look.


Lower School artists are also encouraged to explore 3D design and form by building colorful sculptures with the blocks too.


And as always, drawing is a wonderful way to fill your time here at school and at home. Students can draw from observation or do imaginative sketches for fun. Having the materials out and on display is usually all the incentive that is needed for some creative time!


Tuesday, December 6, 2016

THIRD GRADE . . . Mannequin challenge

Today in art class, third graders continued to draw with their wooden artist models and then we took turn posing for each other. A model has to pose without moving which can be really hard to do! To get us all to see how difficult it is not just to draw a live figure, but to hold a pose, we tried our own mannequin challenge.

Here we are posing like models . . . or maybe mannequins?

Friday, December 2, 2016

GRAPHIC ARTS . . . Stepping into a painting!


Wouldn't it be great to back in time and pose for Leonardo da Vinci? You could become as well known as the Mona Lisa! How about if you were standing on the bridge to Giverny just as Claude Monet captured his impressionist scene? With digital magic, anything is possible!

Each graphic artist selected an image of a famous painting. Then they posed for a photograph in a way that would fit in with the action of the painting. These two digital images were merged together on the computer in Adobe Photoshop. We learned many techniques for this project, such as copying and pasting part of one image into another with the selection tool. We used an editing tool called free transform to adjust the size and angle of the photograph so that it fits perfectly in place. We learned how work with layers and when one layer should be transparent. The lasso tool outlines parts of the digital image and this allowed us to delete the real background of our photographs so that our images look like they stepped into the painting. Finally, using artistic filters, we could transform our photographs into an appearance that better matches the style of the painting.

Please note, to respect the privacy of our students, I did not label our work with the artist names. I hope you recognize everyone here. After all, we could become as famous as our paintings!!