Wednesday, November 1, 2017

SECOND GRADE . . . We are Pop Artists

Portrait by Gianna

Portrait by Elijah

Portrait by Claire

Second Graders finished their colorful Pop Art Portraits this week. We used different colors for each background and varied the colors for our hair, shirt and small designs. Choosing different colors for each of the four portraits imitates the style of Andy Warhol's popular silkscreen art during the 20th century.

It was fun to see how we would look with red hair, black hair, or even gray hair! By adjusting the color palette for each of our portraits, we learned how make unique and creative choices, not once but four times. Color can make such a difference in the appearance of any design. Our bright and colorful portraits prove that beautifully!


The inspiration for our project comes from the work of Andy Warhol, a well known Pop Artist from the 20th century. His art was a reaction to the sudden popularity of celebrities and mass produced items of that century, such as Coca Cola bottles and Campbell's Soup. He was also the one who came up with the expression, "In the future, everyone will be world-famous for 15 minutes." Most of Warhol's images are done as multiple prints to reflect just how "popular" the image is to all of us. We did not see Marilyn Monroe once, we saw her over and over again in movies, on TV, and in magazines. Warhol's portrait of Marilyn reflects her fame and her popularity.

Andy Warhol created multiple images for his Pop Art prints using a popular printing technique. He designed only one version of each portrait he made, and then constructed a screen from that image so that he can print it many times. This process is called "silk screening." When you purchase a printed T-shirt from a store, chances are the printing was done this way. Each shirt looks exactly the same because they were all printed from the same screen.

Here is a screen that I made with the Ranney School logo. A very fine fabric (similar to silk) was stretched over a wooden frame and then coated with a film to seal off the holes in the fabric. Only the area that shows the Ranney logo is not coated. Fabric paint is then forced through the holes of the screen with a squeegee.


When the screen is lifted up, the shirt displays the printed logo.

Andy Warhol often used many colors with one screen and varied the colors from one print to the next. The images look identical, but the use of color makes them appear as separate works of art. By varying the markers we selected for our hair, shirt and background, we were be able to make our own version of a Pop Art portrait.
Here is a question for you . . . If Andy Warhol was still creating his Pop Art images, what very famous person do you think he might want to do a portrait of today?

Please log onto Artsonia, an online museum that Ranney School participates in and see all of our portraits. If you have not already registered to the site and you need the login information again, please contact me!  http://www.artsonia.com/schools/school.asp?id=114839


Note to families . . .
    This art blog will be updated regularly with new posts sharing our daily activities in the art room and news about upcoming art exhibits. To respect the privacy of our students, names will always be limited to first name only and identifiable photos will never be accompanied with a name. If you have any questions or comments, please feel free to write in the comment box below or send me an email at blevine@ranneyschool.org. I would love to hear from you!
    In my class, students are given the chance to explore different materials and fun new techniques as they develop their signature style. Some young artists love to draw with a pencil, some like to paint on canvas or create images in a digital format, while others prefer working with clay and molding three-dimensional forms. In my classroom, we use a variety of materials allowing all artists to experiment and figure out which type of art they like the best. At Ranney School, we place a strong emphasis on originality and celebrate artistic differences, always nurturing and encouraging the imagination of every student.
     Remember to check out our display of finished artwork and student portfolios in the Ranney home page of Artsonia.com.  http://www.artsonia.com/schools/school.asp?id=114839

Tuesday, October 31, 2017

THIRD GRADE . . . Drawing a selfie!

Every grade in Lower School will have a self-portrait in our upcoming art show. It is a great way to get to know our new friends through self expression and creative discovery. Some grades do a pencil sketch, some show off their love of color with markers or crayons, and others are experimenting with new technology and retouching their photos on the computer. Third graders created their self portrait as a full painting on canvas. We used 11 x 14 canvas boards for this project and we selected a color palette that best represents us.

To create our portraits, we began with an oval for the face. The vertical line down the middle of the oval divides our face in half. We are all basically symmetrical and everything we add to one side of this line we can repeat on the other side.

It is hard to believe that your eyes are half way down your head, but the horizontal line dividing the head in half is where we draw our eyes. The eyes begin as an oval but then we correct the ends of each oval to look more like an almond shape. Students learned how to add the iris inside the eyes as if they are adding a pair of parentheses, from top to bottom. We don't want to see any white above or below the circle of color in our eyes. We added eyelids and eyebrows to complete our eyes. The nose in a third grade painting is a realistic nose that sits halfway between the eyes and the chin. Then the mouth which begins as just an expression line is halfway between the nose and the chin.

Next. we completed the mouth with a lower lip and an upper lip. Notice how the mouth is wider than the nose? Students often make their mouth too small. And boys all giggle when they have to draw lips! We all have two lips on our adorable faces, why not draw them? The lips do not have to be painted in with bright red, but they are definitely part of our face.

The ears line up with our eyes. They start at the line of the eyes and go down as far as the base of the nose. We added a neck wide enough to support our heads but not too long. (I don't remember any giraffes sitting in art class today!) Finally, to indicate a body, we add shoulders that are nicely rounded and extend past the width of the head on both sides.

Short Hair
Long Hair
Hair is a big deal for our self portraits, Based on the color and the style it can do more to make our self portraits look just like us than any other feature. To begin drawing the hair, we start with the hair line, just above our foreheads. We draw a line from one ear up above the eye brows, across the oval, and back down to the other ear. Depending on the part in your hair or whether or not you have bangs, this line can reflect your hairstyle.

To make short hair, we draw a line around the top of the oval, adding volume above our head. To make long hair, we start at the top of the oval and bring the hair down to the shoulders. Adding special details such as a design on the shirt, or headbands and jewelry, also helps to express our personality through our portraits and tell the world who we are.


Note to families . . .
    This art blog will be updated regularly with new posts sharing our daily activities in the art room and news about upcoming art exhibits. To respect the privacy of our students, names will always be limited to first name only and identifiable photos will never be accompanied with a name. If you have any questions or comments, please feel free to write in the comment box below or send me an email at blevine@ranneyschool.org. I would love to hear from you!
    In my class, students are given the chance to explore different materials and fun new techniques as they develop their signature style. Some young artists love to draw with a pencil, some like to paint on canvas or create images in a digital format, while others prefer working with clay and molding three-dimensional forms. In my classroom, we use a variety of materials allowing all artists to experiment and figure out which type of art they like the best. At Ranney School, we place a strong emphasis on originality and celebrate artistic differences, always nurturing and encouraging the imagination of every student.
     Remember to check out our display of finished artwork and student portfolios in the Ranney home page of Artsonia.com.  http://www.artsonia.com/schools/school.asp?id=114839 

THIRD GRADE . . . Painting our portraits

Portrait by Mia B.

Portrait by Ishana

Portrait by Connor

Portrait by Francesca

Portrait by Jonathan

Third graders were excited to express their personality through these colorful portraits. We blocked in the main colors of the canvas first, the skin tone, the shirt and the background designs. Our hair, the features of our faces and any other small detail designs were added as finishing touches.

Just like with our skin tones, we tried to match our hair color to best represent us in the portrait. With a wide brush we painted the hair in the same direction our hair grows, treating the paint brush as we would a hair brush. With a smaller detail brush we added eyebrows to match the hair color.

For our eyes, we painted just the center circle of the drawn eye with blue, brown or hazel. Then using the smallest brush possible, we added the black circle of the pupil, a white dot for the highlight in the eye, and a very thin line to create the upper lid, indicating the line of the lashes. This is how famous impressionist artist, Pierre-Auguste Renior, painted eyes in his portraits. Simple and soft, but very realistic looking. We finished up our portraits with a lip color and added other details to make our portraits special and uniquely ours.

I hope to see everyone at the art show later this month in Panther Hall Gallery! You can also log onto Artsonia, an online museum that Ranney School participates in and see all of our 3rd grade artwork there.  http://www.artsonia.com/schools/school.asp?id=114839

Monday, October 30, 2017

Beginners . . . Starting with a circle!

Artists in Lower School will be presenting their self-portraits in Panther Hall gallery next month, and Beginner artists are proud to have their artwork right there on the wall with all of their older friends! These drawings are wonderful and spontaneous depictions of how they perceive the world. It is an exciting discovery in self-expression and creative pride that begins as early as Beginner classes at Ranney School.

Can you picture the well known M&M cartoon character with his arms and legs coming out of the head of the round candy? You might see this same characterization in any child's drawing. As young artists perceive people around them, the face is the most important element, and everything (such as arms and legs) are simply extensions of the face. There might be a body between the head and the legs, but in their eyes, it is not as important to recognize or represent in their artwork.

To help our Beginners move forward beyond an M&M drawing, they drew their head and faces after practicing circle drawings, and then made an important decision about what color they would like their shirts to be. Creating a body with their color choice was just a matter of another circle in the portrait and then filling it in. Arms and legs are often single lines at this point in their creative development, but they were encouraged to have them extend out of their body and not their heads.

Here are some examples of our portraits! To see all of our self-portraits, follow this link to Artsonia and scroll down to the Beginners exhibits.   http://www.artsonia.com/schools/school.asp?id=114839


Portrait by Akira

Portrait by Sebastian

Portrait by Jai


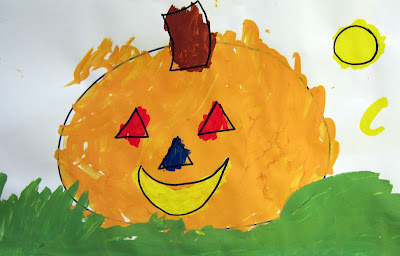
BEGINNERS . . . Orange Pumpkins!


Our 3 year old artists learned the magic of mixing colors in art class! For the month of October we learned how to create the color  ORANGE  by blending together red and yellow paints.

With our mixed colors, we painted big orange circles on the paper with a paintbrush. These large circles became a Jack-O-Lantern after we added a stem, eyes, and a big smiling mouth.

To create the  GREEN  grass, we mixed blue and yellow together. This new blended color became the green grass at the bottom of our paintings.

Here are some examples of our finished Jack-O-Lanterns! To see all of our work, click on this link for artsonia and look through our art projects. Happy Halloween everyone!
http://www.artsonia.com/schools/school.asp?id=114839


Painting by Catherine

Painting by Noah

Painting by Francesco


Note to families...
This art blog will be updated regularly with new posts sharing our daily activities in the art room and news about upcoming art exhibits. To respect the privacy of our students, names will always be limited to first name only and identifiable photos will never be accompanied with a name. If you have any questions or comments, please feel free to write in the comment box below or send me an email at blevine@ranneyschool.org. I would love to hear from you!
    In my class, students are given the chance to explore different materials and fun new techniques as they develop their signature style. Some young artists love to draw with a pencil, some like to paint on canvas or create images in a digital format, while others prefer working with clay and molding three-dimensional forms. In my classroom, we use a variety of materials allowing all artists to experiment and figure out which type of art they like the best. At Ranney School, we place a strong emphasis on originality and celebrate artistic differences, always nurturing and encouraging the imagination of every student.
     Remember to check out our display of finished artwork and student portfolios in the Ranney home page of Artsonia.com.  http://www.artsonia.com/schools/school.asp?id=114839