Friday, October 10, 2014

FIFTH GRADE . . . Learning how to appreciate art


Fifth graders have been bringing their sketchpads into art class. We took turns presenting our drawings with the class and we learned how to talk about each drawing. We were able to point out something specific about the sketch and we could ask the artist questions as well. How amazing would it be to go to a museum and actually ask Vincent van Gogh why he painted swirls in the sky of his "Starry Night!" To be able to ask an artist a question gives us an opportunity to learn and appreciate so much more about the art.

It is not enough just to say you like a picture; we want to know why you like it. When we discuss a drawing in class, these are some of the elements of art we can recognize or talk about:
1. Is the image realistic or abstract?
2. Can you talk about color...  Is it soft, bright, or bold?
3. How was the object shaded?
4. Is there an interesting design or composition on the page?
5. Is there a sense of movement?
6. How does the picture make you feel... Are you happy, sad, calm, nervous?
7. What can you say about the subject of the drawing or even the background?

Here are some of the sketches my students brought in when they were asked to draw their favorite thing in their bedroom.

Sketch by Emily
Emily's origami bird is not only beautifully drawn and recognizable, but the way she shaded the drawing makes us really see the delicate creases in the paper and we instantly understand that it is origami. I was impressed not only with the drawing, but with her ability to fold the paper so perfectly!


Sketch by Cynthia
Cynthia focused on her dresser top and vanity mirror, including her self-portrait in the mirror. I love how intently she is staring at her image as she made her drawing. Self portraits are rarely smiling... you draw what you see in your reflection and while you are working, you often have a very serious expression.


Sketch by Vincent
Vincent drew a sketch of his electric guitar. All the details that he included makes us realize just how well he knows his instrument and how much he was able to tell us about it through his drawing. It almost seems to be waiting for someone to pick it up and start playing music!


Emily, Cynthia and Vincent showed us three very different examples of how you could have completed your sketch and I hope they inspire everyone in 5th grade to draw!

These artists would love to hear from you! Please add your own thoughts and reflections about any of these three drawings in the comments box below...

Thursday, October 9, 2014

Faculty Art Show!


How wonderful it must be to be a Ranney student, to travel up through the grades and the divisions, and discover what each of the art teachers can offer you on your creative journey. Ranney School is hosting a faculty art exhibit, now on display in Panther Hall Gallery. The exhibit highlights our own creative styles and reminds students that we are all working artists as well as your art teachers.


My paintings in this art exhibit reflect my own personal creative journey, how I learned how to observe and record my unique vision of reality. When I am immersed in a project, I always have to remind myself to step back every now and then and look at what I have been creating from a different perspective. It might simply be that I have to walk away from a painting and look at it with fresh eyes the next day. Sometimes I take a photo of the canvas with my phone or iPad and see how it looks on a small screen as opposed to real life. Does something need to be a different color? Do my eyes focus on what I want everyone else to notice?  I have learned something from each one that I not only bring as a skill to my next painting, but it becomes something I can share with my students at school. My art classes have never been taught out of a textbook, but out of my own experience as an artist. I am inspired by my students, and hopefully I inspire them. It is vital to me to be a working artist and so important for them.

Having my work on display at school also allows me see my work through the wide eyes of my students who could not believe I painted the adorable beagle or the larger-than-life tennis ball. This opportunity to observe my work from a different viewpoint is just like stepping away from the canvas and taking a look with fresh eyes on a new day. I am, once again, excited to begin a new canvas at home and see what creative ideas I can discover this time!

Please come to school and enjoy the work up in Panther Hall Gallery, now through the middle of next week. From the Middle School, you can also see the detailed architectural studies and wonderful ceramic pieces created by Mrs. McCarthy. In the Upper School, Mrs Shipley's intricate data drawings invite you to step up close and examine the beautiful designs that her visual path of information creates on her canvases. Mr. Sullivan, our new Upper School art teacher, has shared with us his expansive landscapes that seem to be as flat as the canvas they are painted on, but at the same time so full of dimension and space. Those students lucky to have Mrs. Greenberg can see her paper cast images. She gets you to notice the shape of objects in a new light, and her own analysis of her work is quite personal and inspiring. As artists, we complement each other in our department and we bring an amazing breath of knowledge and experience to our students.


Wednesday, October 1, 2014

FOURTH GRADE . . . Mirror image writing


Fourth grade students were asked to read this quote by Leonardo da Vinci as they entered the art room. Everyone recognized it as backwards writing and most had no trouble figuring out what it said, after stumbling over a few words here and there! We talked about the reasons that Leonardo might have written in mirror image and discovered that many of his journals contained top secret inventions he worked on for the government. It could be that he was writing in code. At a glance, the mirror image letters might appear to be from another language and someone glancing at the page would not bother to take the time to figure out his code.
    We also discovered that Leonardo wrote with his left hand. That means that all of you "Lefties" are in good company. Leonardo was a very talented and brilliant man! When you write from Left to Right across the page, a person writing with his left hand might smudge the letters just printed. However, if you write with your left hand and are writing in mirror image, then you write from Right to Left and your hand does not cover the wet ink. Perhaps mirror image writing was simply a brilliant invention by a left handed artist to not smudge his work!


This is Leonardo's quote written the correct way. We then talked about what it could mean and I heard the most wonderful interpretations from my students. People who can "see" can imagine a different way to do something. For a Renaissance man like Leonardo da Vinci, living life to the fullest meant always discovering new and better ways to understand the world. He used painting, music, mathematics and science to help him come up with new visions of the world, amazing inventions, and a new standard of mastery in art.

Brandon in Mrs. Robinson's class was very clever when he explained that it is just like looking up at the clouds. Some people might see the shape of something in the clouds, such as a dog. Others will recognize that it looks like a dog after being shown how the clouds take on the shape of a dog's head, the feet, perhaps the tail. The last group of people would insist that it is just a cloud, nothing more. Not everyone has the vision to see things in a different way. Great analogy, Brandon!

Other students suggested that having the ability to "see" might also mean being able to think of a new way to use something, just like re-purposing a box or a toy that you don't need anymore. How many of you could come up with another use for a box instead of throwing it out?

We started practicing mirror image writing in class and it was a challenge for many of us to write that way. Emma had an easier time with her name because the M's and the A are the same written both ways. She just had to figure out how to write the E backwards. As more class time allows, we will try drawing other lines and shapes in mirror image, all in preparation for drawing our portraits this way. Try practicing this skill at home. The more comfortable you are seeing outlines and shapes in mirror image, the easier it will be to draw in mirror image too.


Note to families . . .
    This art blog will be updated regularly with new posts sharing our daily activities in the art room and news about upcoming art exhibits. To respect the privacy of our students, names will always be limited to first name only and identifiable photos will never be accompanied with a name. If you have any questions or comments, please feel free to write in the comment box below or send me an email at blevine@ranneyschool.org. I would love to hear from you!
    In my class, students are given the chance to explore different materials and fun new techniques as they develop their signature style. Some young artists love to draw with a pencil, some like to paint on canvas or create images in a digital format, while others prefer working with clay and molding three-dimensional forms. In my classroom, we use a variety of materials allowing all artists to experiment and figure out which type of art they like the best. At Ranney School, we place a strong emphasis on originality and celebrate artistic differences, always nurturing and encouraging the imagination of every student.
     Remember to check out our display of finished artwork and student portfolios in the Ranney home page of Artsonia.com.  http://www.artsonia.com/schools/school.asp?id=114839

Tuesday, September 30, 2014

SECOND GRADE . . . How can you make a copy?

Portrait by Ava
Portrait by Gavin
We are working on our self-portraits in Second Grade. Everyone created a wonderful outline drawing of themselves in pencil and black marker. These simple portraits will be reproduced 4 times on a copy machine and then handed back to the class next week to complete in many shades of colorful markers.


The inspiration for our project comes from the work of Andy Warhol, a well known Pop Artist from the 20th century. His art was a reaction to the sudden popularity of celebrities and mass produced items of that century, such as Coca Cola bottles and Campbell's Soup. He was also the one who came up with the expression, "In the future, everyone will be world-famous for 15 minutes." Most of Warhol's images are done as multiple prints to reflect just how "popular" the image is to all of us. We did not see Marilyn Monroe once, we saw her over and over again in movies, on TV, and in magazines. Warhol's portrait of Marilyn reflects her fame and her popularity.

Andy Warhol only made one portrait of Marilyn and then printed it out many times. We talked about the many ways someone can make an exact copy of an image. Some of my students thought about using a copy machine just like I will be doing with everyone's marker drawings. And what happens if you take a photograph with a camera and print out more than one copy? Each copy of the photograph will look exactly the same. An image from a computer can also be printed out multiple times. One second grader suggested we can even trace a drawing with tracing paper. That is a wonderful idea too!

Andy Warhol created multiple images for his Pop Art prints using a popular printing technique. He designed only one version of each portrait he made, and then constructed a screen from that image so that he can print it many times. This process is called "silk screening." When you purchase a printed T shirt from a store, chances are the printing was done this way. Each shirt looks exactly the same because they were all printed from the same screen.

Here is a screen that I made with the Ranney School logo. A very fine fabric (similar to silk) was stretched over a wooden frame and then coated with a film to seal off the holes in the fabric. Only the area that shows the Ranney logo is not coated. Fabric paint is then forced through the holes of the screen with a squeegee.


When the screen is lifted up, the shirt displays the printed logo.

Andy Warhol often used many colors with one screen and varied the colors from one print to the next. The images look identical, but the use of color makes them appear as separate works of art. We will use this idea with our marker portraits. We drew only one portrait on paper and these drawings will be copied on a copy machine. Next week we will experiment with color.  By varying the palettes we select for our hair, shirt and background, we will be able to make our own version of a Pop Art portrait.

Here is a question for you . . . If Andy Warhol was still creating his Pop Art images, what very famous person do you think he might want to do a portrait of today?

Note to families...
This art blog will be updated regularly with new posts sharing our daily activities in the art room and news about upcoming art exhibits. To respect the privacy of our students, names will always be limited to first name only and identifiable photos will never be accompanied with a name. If you have any questions or comments, please feel free to write in the comment box below or send me an email at blevine@ranneyschool.org. I would love to hear from you!
    In my class, students are given the chance to explore different materials and fun new techniques as they develop their signature style. Some young artists love to draw with a pencil, some like to paint on canvas or create images in a digital format, while others prefer working with clay and molding three-dimensional forms. In my classroom, we use a variety of materials allowing all artists to experiment and figure out which type of art they like the best. At Ranney School, we place a strong emphasis on originality and celebrate artistic differences, always nurturing and encouraging the imagination of every student.
     Remember to check out our display of finished artwork and student portfolios in the Ranney home page of Artsonia.com.  http://www.artsonia.com/schools/school.asp?id=114839

Tuesday, September 23, 2014

GRAPHIC ARTS . . . The Art of Photography

Lower School electives have begun and graphic artists are taking advantage of the beautiful autumn weather on the Ranney School campus. It is the best time of all to head outside with a camera and take photographs of things in nature.

Each group is focusing on images outside on the grounds of the school with their digital cameras. We are learning how to properly carry a camera, how to hold it steady while shooting an image, and how to frame the picture. Once we all have images saved to our folders on Google Drive, we will begin working in Ranney School's new Media Center and discover how Photoshop can crop, adjust and alter our pictures for our first project.


Here are some things to remember when taking a picture with your camera (or even your smartphone) ...

1.  A digital camera has a monitor that frames your image. Take advantage of this feature and make sure you have included all of the image within this frame. With Photoshop you can always crop off the part you don't want in your composition, but it is really hard to re-create the top of someone's head! Just to make sure, allow for plenty of room all around your subject matter.

Photo by Winston
2.  Most cameras (and phones) have a zoom feature. It is much better to walk closer to the image than it is to stand far away and zoom in on it. The camera does a sharper job of focusing without using the zoom. Winston came really close to take this picture of three blades of grass on the bricks. Look at how sharp it is! If you can't come this close, it is always better to crop away the extra background and zoom in on the subject right on the computer screen with retouching programs like Photoshop.

3.  Hold the camera steady when you are shooting. The digital cameras we use have an auto focus function, as do phones. If your hand shakes when you snap the picture, you are not giving the camera a chance to focus. A blurry picture is not usually the fault of the camera, but of the photographer. Sorry!

4.  Watch where your hands are when you take a picture. I know that many times I was so busy getting just the right picture that I never noticed my finger covering part of the lens.
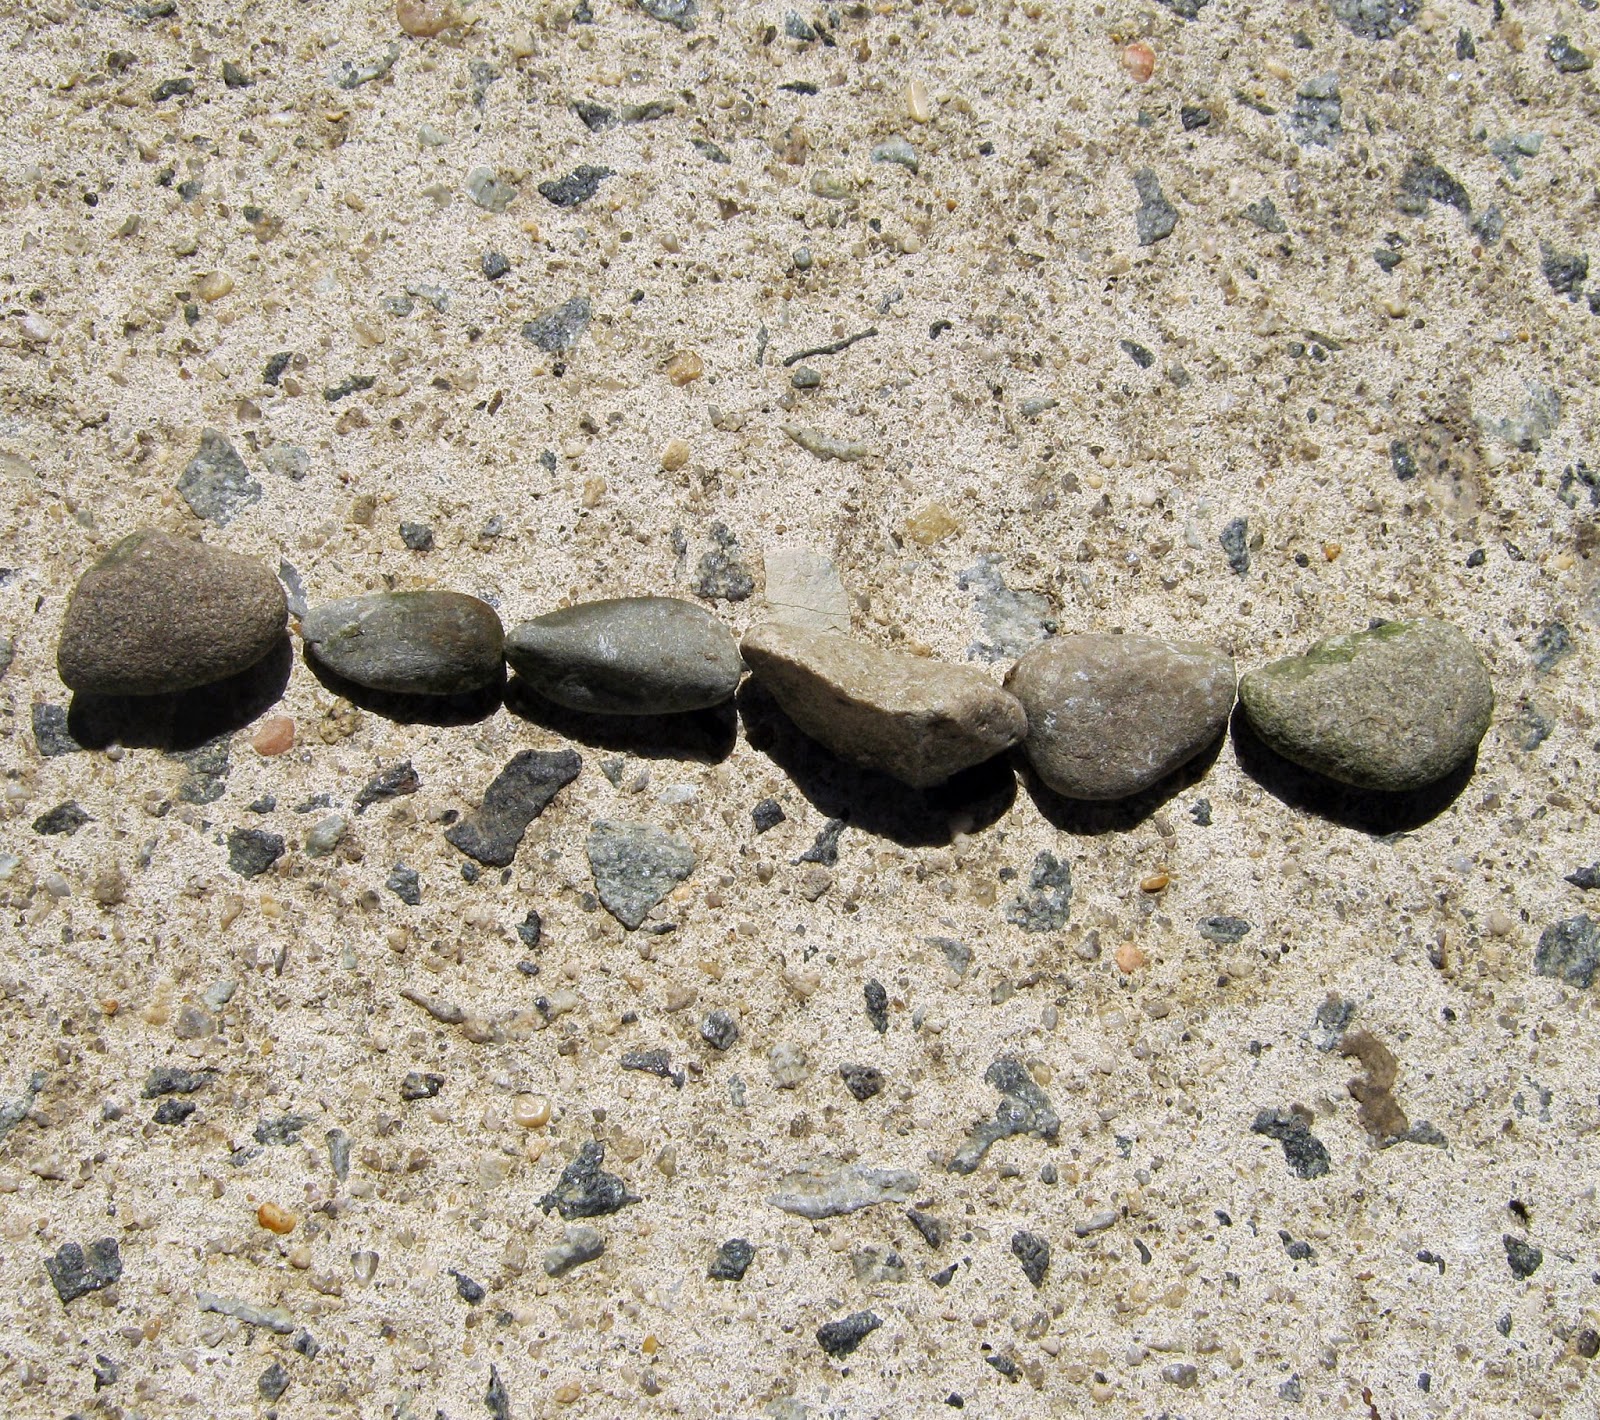
Photo by Taylor
5.  The greatest thing about digital cameras is how many photographs you can capture on one small memory card. If you are not sure the photograph was perfect, take another shot. You may never have the chance to stand in that same spot, with the same perfect lighting, and with the same subject again. Taylor's beautiful photograph of pebbles would not be the same at any other time of day. She caught just the right amount of shadow under each rock.

6.  This last tip is for compact digital camera users. When the camera is "on" and in shooting mode, a lens pops forward out of the body of the camera. If the camera falls or hits something, this lens can jamb or lock into this position, not allowing you to turn it off. It is the most common reason a digital camera is brought in for repairs. When you are not shooting photographs, remember to turn your camera "off" and save your lens, not to mention your battery life!

If you love to take photographs at home, I would love to see them! Bring them in and share them with the class.

Feel free to add your own comments and tips about photography below.
Happy picture taking, everyone!


Note to families...
This art blog will be updated regularly with new posts sharing our daily activities in the art room and news about upcoming art exhibits. To respect the privacy of our students, names will always be limited to first name only and identifiable photos will never be accompanied with a name. If you have any questions or comments, please feel free to write in the comment box below or send me an email at blevine@ranneyschool.org. I would love to hear from you!
    In my class, students are given the chance to explore different materials and fun new techniques as they develop their signature style. Some young artists love to draw with a pencil, some like to paint on canvas or create images in a digital format, while others prefer working with clay and molding three-dimensional forms. In my classroom, we use a variety of materials allowing all artists to experiment and figure out which type of art they like the best. At Ranney School, we place a strong emphasis on originality and celebrate artistic differences, always nurturing and encouraging the imagination of every student.
     Remember to check out our display of finished artwork and student portfolios in the Ranney home page of Artsonia.com.  http://www.artsonia.com/schools/school.asp?id=114839


FOURTH GRADE . . . The Art of Photoshop

Every grade begins the year with a self portrait project as we get to know each other and all of our new friends. Fourth graders in general art are discovering the magic of modern technology with their self portraits as we blend traditional art forms with digital images on the computer. Leonardo da Vinci will be our inspiration for the more traditional lessons in drawing portraits, but I have always thought that Leonardo would have been a very eager student of all things digital in our modern world. Imagine what he could have done with the art and science of Photoshop!

Adobe Photoshop is a wonderful retouching tool for professional graphic artists, but as most of us have access to a digital camera, either through a smart phone or by using an actual camera, we should all know how to upload photos to a computer and use them in different applications. We should also know how to correct an image, change its size, or adjust the color. With Photoshop, my fourth grade students will learn how to do all of that, as well as discover how to change a digital image into a creative and original work of art.

With new advances in technology there is always a moment we have to step back and review what impact this new technology will make in our lives. Before the new digital technology, cameras took a picture by exposing an image onto film. Unless you were very skilled at darkroom techniques, the image was printed just as it was captured by the camera lens. The best we could do at the time was use a pair of scissors to crop the photo. Now with software such as Adobe Photoshop, photos can be altered and you would never realize a change was made.

Here is a link to a video created by Dove Beauty that I shared with my classes. This really highlights the significance of Photoshop and how photo retouching software impacts our perception of reality. Growing up, I always assumed that if it was a photograph, and not a painting or a drawing, the image had to be real. This assumption can no longer be made. More than ever before, photography is a creative art form and not just a recording of life.

Here is the link for the video...


Tuesday, September 16, 2014

Can You Find Your Design?

The best part of doing a collaborative project is finding out which important part of the whole design you helped to create. We finally finished one full rotation of our 6 day schedule and everyone has visited the art room. As an introduction to the first day in art, all students in Kindergarten through 5th grade designed circles to celebrate International Dot Day, inspired by the book, "The Dot," by Peter H. Reynolds. To learn more about this wonderful story, scroll down to my earlier post and watch a video of the book.


Our dots are as unique from each other as we are, but together they spell out the name of our school. Just in time for Back to School Night, our dot display celebrates the start of a new year with best buddies and brand new friends.


Happy International Dot Day, Ranney School!


Monday, September 15, 2014

INTERNATIONAL DOT DAY!


Off we go with a creative start to our new school year! One more day and all of our Lower School students will have been introduced to the art room. We are learning the names of our new friends and finding the perfect seat at my big blue tables.

For our first project across all the Lower School grades, we looked at a short clip of  "The Dot," a story by Peter H. Reynolds. In this inspiring tale, a young art student, Vashti, is afraid to draw on paper because she thinks she is not a good artist. Her teacher suggests that she just make a mark and see where it takes her. This journey of how Vashti discovered her creativity with just a simple dot inspired us to make our own spontaneous designs on paper.


In celebration of this book and the encouraging message it brings to art students, schools all around the world join together in recognition of International Dot Day, September 15th! At our school, students are working together to help design the name of Ranney School in a large and colorful collaborative dot project.

My message for today...
Just make a mark and see where it will take you!


Thursday, September 4, 2014

A NEW AND CREATIVE YEAR!

Welcome to my daily art blog for Ranney Lower School! Be sure to follow my blog, see highlights of student artwork and videos featuring our young artists, and be updated with news from the art room all year long! (You can join this site with a link to the right.) As we take our creative journey through this school year, you may notice that many of our projects are based on the work of a famous artist or illustrator, and that we often look beyond our classroom walls to other cultures for inspiration. Together, we will see how the style of an artist can influence our own creative efforts as well as help us realize and represent our place in the rich world of art history.

All of my students are given the chance to explore different materials and fun new techniques as they develop their signature style. Some young artists love to draw with a pencil, some like to paint on canvas or create images in a digital format, while others prefer working with clay and molding three-dimensional forms. In my classroom, we use a variety of materials allowing all artists to experiment and figure out which type of art they like the best. At Ranney School, we place a strong emphasis on originality and celebrate artistic differences, always nurturing and encouraging the imagination of every student.


Getting Ready for Art

All students, grades Kindergarten through 5th grade should bring in an artist portfolio. If you have one from last year, you are welcome to use it again. Place a new label on the front with the student name and new homeroom teacher. I prefer to have these thin cardboard portfolios for storage in my room, frequently found as a red cardboard portfolio with plastic or woven handles. 17" x 22" or a little larger is perfect. Please do not bring in a very large or a thick leather case. It is only for storage in my room and I will not have the space to hold extra large cases. I look forward to filling these portfolios with wonderful artwork all year long!

5th grade art students should also bring in a sketchpad each week on art days. We will talk about sketchpads in class. Otherwise, all materials you need for art, including artist's smocks, are already in my room. Come ready to have fun!


Wednesday, June 11, 2014

FEATURED ARTISTS!

Congratulations to all of my Lower School artists for another successful year in art! I hope that everyone has a fun and relaxing time with their friends and families. Be sure to save some time to draw during your time in the sun and bring in your creative sketches to share with us in September. We would all love to see how you enjoyed your vacation away from school!

Here is my latest Featured Artist video for this year. Make sure the sound is turned on to hear the voices and artist statements of all of our artists. Well done everyone!