Wednesday, March 4, 2015

FIRST GRADE . . . The Miro Project

This is our first grade Miro project! This month, we worked on different activities to experience the whimsical style of Joan Miro. On the Smart Board, we discussed the work of this artist. In this first video, you can see what we thought of his paintings and sculptures...


Joan Miro's observations of the world as we saw in the video were quite whimsical and creative. Miro's art teacher tried to get him to observe objects in a more realistic way and as an exercise, he asked him to draw objects that he could only see by feeling with his fingers. We tried this in class. Students put their hands inside a paper bag and drew what they felt with their other hand. Once all objects were drawn, we looked inside and compared the objects we felt with the ones we drew. They were remarkably realistic! Our fingers will often notice small textures and a rounded edge that our eyes might not detect. Finally, we put all the shapes together, creating a drawing of a Miro-inspired person. Here is a video showing this surprisingly fun activity...


For the final part of our Miro project, first graders created a sculpture of a person using assorted materials, such as paper, wood, pipe cleaners, straws and feathers. Our only rule in our interpretation of a 3-D person was that it should tell a story about the person we sculpted. It could be an artist, a musician, or perhaps a veterinarian. The sculpture can let us know about who the person is by what it might be wearing or holding in its hand. Here are a few examples of our completed sculptures.

You can see all of our work by following this link to the first grade exhibition on artsonia.   http://www.artsonia.com/schools/school.asp?id=114839

Sculpture by Ava
Sulpture by Drew

Sculpture by Jayden

Sculpture by Eli

Thursday, February 26, 2015

KINDERGARTEN . . . What is a sculpture?


We learned about 3-D art in Kindergarten this week! What is the difference between a sculpture of a person and a flat painting of a person? We talked about how a sculpture can be made of many different materials, such as clay, wood, plaster, cardboard and metal. We also saw how a sculpture can be seen from all around. You can take a walk around the sculpture and see the sides, the back, the top and the front. You can even see the bottom if it is displayed on a clear base! What happens if you turn a flat portrait around? You just see the back of the paper or canvas. You do not see the back of the person!


We started with white modeling clay. To dye the clay a color, we first learned a technique of applying a water based marker on the clay and then kneading the clay until the marker has turned the clay into whatever color we selected. Kneading clay takes time and a lot of muscle power!


To make our sculptures, we rolled part of our clay into a ball. That was the easiest step for everyone and so much fun! Then we rolled a smaller ball for the head and even tinier balls for the feet. Using the extra clay we had left over, we created ears, a tail, a horn, stripes or spots. Friends in class were also eager to share their different colors of clay to make very creative looking animals.

Here are some examples of our Kindergarten sculptures! To see all of our animals, click on this link for artsonia.com.
http://www.artsonia.com/schools/school.asp?id=114839

Cat by Vanessa

Unicorn by Lexi M.

Spider by Nathan

Bear by Brooks


Note to families...
This art blog will be updated regularly with new posts sharing our daily activities in the art room and news about upcoming art exhibits. To respect the privacy of our students, names will always be limited to first name only and identifiable photos will never be accompanied with a name. If you have any questions or comments, please feel free to write in the comment box below or send me an email at blevine@ranneyschool.org. I would love to hear from you!
    In my class, students are given the chance to explore different materials and fun new techniques as they develop their signature style. Some young artists love to draw with a pencil, some like to paint on canvas or create images in a digital format, while others prefer working with clay and molding three-dimensional forms. In my classroom, we use a variety of materials allowing all artists to experiment and figure out which type of art they like the best. At Ranney School, we place a strong emphasis on originality and celebrate artistic differences, always nurturing and encouraging the imagination of every student.
     Remember to check out our display of finished artwork and student portfolios in the Ranney home page of Artsonia.com.  http://www.artsonia.com/schools/school.asp?id=114839

Wednesday, February 25, 2015

SECOND GRADE . . . Ranney School Landscapes


Our latest drawing project was inspired by the work of Norman Rockwell, a beloved artist and illustrator who created scenes of everyday life in America during the mid 1900's. His drawings and paintings are remarkably realistic and show details that never fail to amaze his viewers. Best known for his illustrated covers of a popular magazine, "The Saturday Evening Post," Rockwell captured American culture at its best, through images of children, life in a small town, and current events. If anyone has a chance to travel to Stockbridge, Massachusetts, please stop off and visit the Norman Rockwell museum. It is the most wonderful place to visit in the Berkshire mountains!

Our project was based on Norman Rockwell's painting, "Stockbridge, Main Street at Christmas". Here, he captured the town he lived and worked in, creating a full street scene with festive details of the season and realistic architectural images.

To create our Ranney School street scenes, we studied the architectural details of the buildings in our school campus. Most of our buildings can be created with a long rectangle and a triangular roof over the front entrance. Some have a sloped roof, such as the Commons, and others might have large white columns, such as the GPA. Focusing on these differences makes our buildings very recognizable. To complete our scenes, we used colored pencils, and just like in Norman Rockwell's scene, some students added snowmen and bare trees to represent the season.

Here are some of our landscapes. To see them in detail, click on the image to enlarge the view. For all of our Ranney School street scenes, click on this link for artsonia.com.


Artwork by Eva
http://www.artsonia.com/schools/school.asp?id=114839


Artwork by Catilyn
Artwork by Marcella


Artwork by Alexander H.
Artwork by Peter


Note to families...
This art blog will be updated regularly with new posts sharing our daily activities in the art room and news about upcoming art exhibits. To respect the privacy of our students, names will always be limited to first name only and identifiable photos will never be accompanied with a name. If you have any questions or comments, please feel free to write in the comment box below or send me an email at blevine@ranneyschool.org. I would love to hear from you!
    In my class, students are given the chance to explore different materials and fun new techniques as they develop their signature style. Some young artists love to draw with a pencil, some like to paint on canvas or create images in a digital format, while others prefer working with clay and molding three-dimensional forms. In my classroom, we use a variety of materials allowing all artists to experiment and figure out which type of art they like the best. At Ranney School, we place a strong emphasis on originality and celebrate artistic differences, always nurturing and encouraging the imagination of every student.
     Remember to check out our display of finished artwork and student portfolios in the Ranney home page of Artsonia.com.  http://www.artsonia.com/schools/school.asp?id=114839

Monday, February 23, 2015

KINDERGARTEN . . . Sharing our sparkling scales

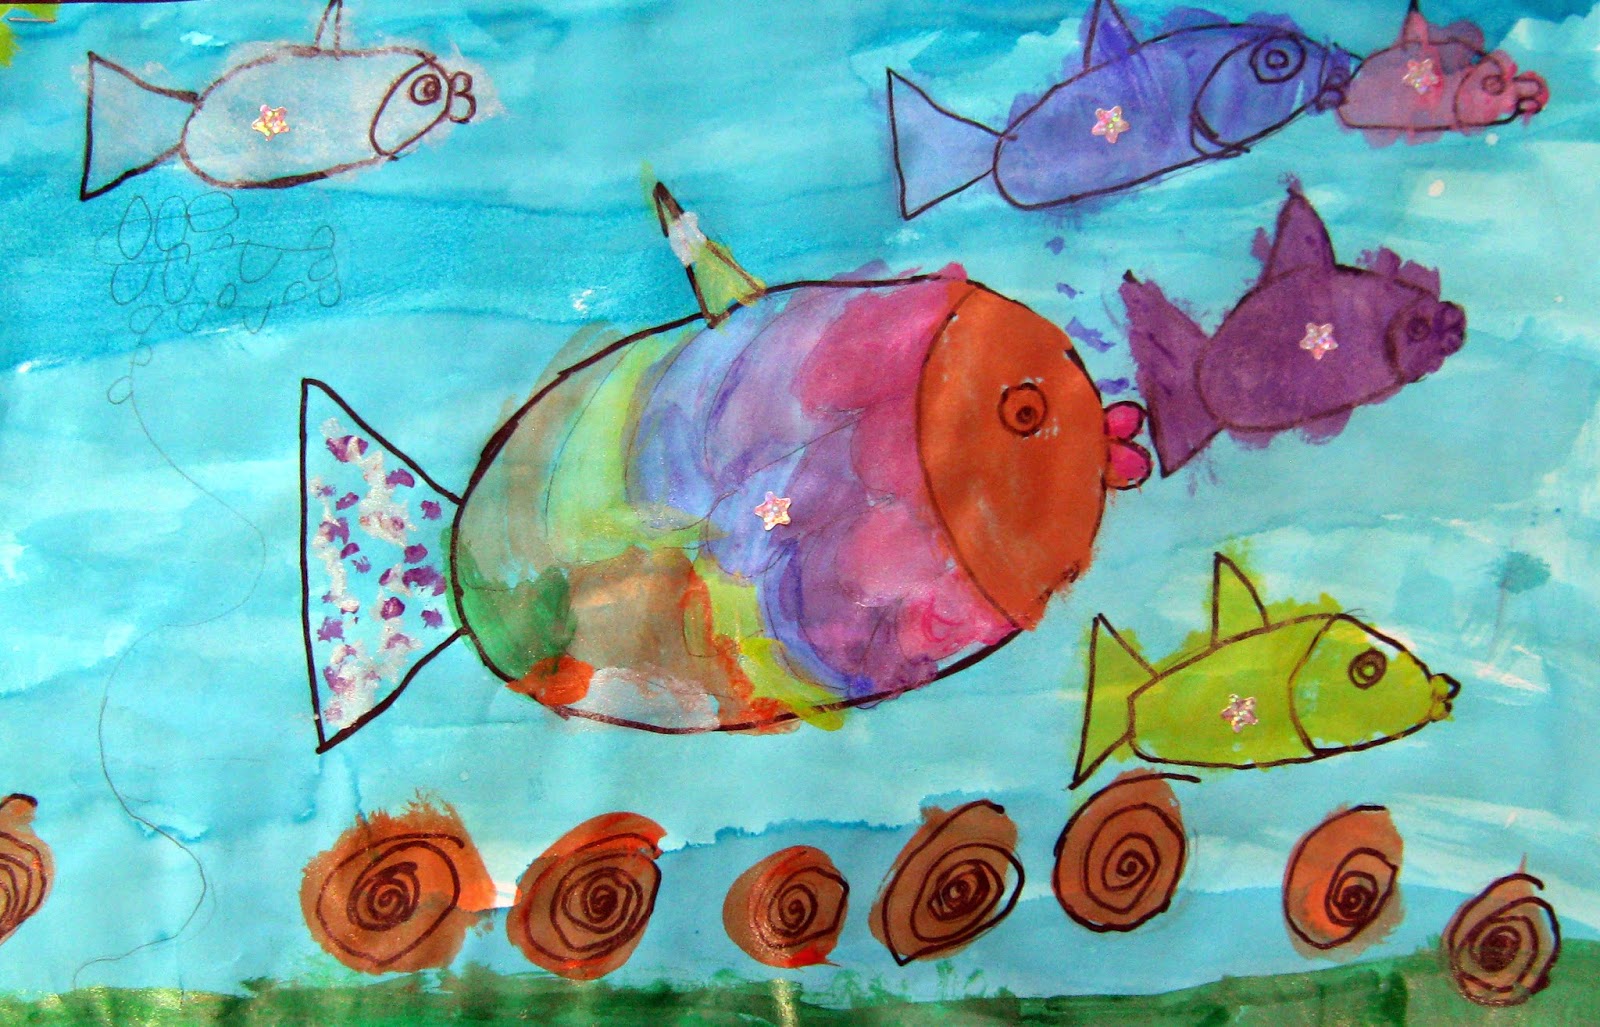
Kindergarten students just completed an underwater scene with watercolor and tempera paints, based on the illustrations in the book, "The Rainbow Fish," by Marcus Pfister. In this story, we read about a beautiful fish who learned the way to true happiness only after sharing his special scales with the other fish in the sea. What activities do you do at home that is more fun when you share them with your friends? Doesn't it feel good when you make someone you care about feel special too?

Here is a video of the story we read together in class to share with your family...


To create our paintings, we first learned how to draw a fish using basic shapes, such as an oval and a triangle. We also learned how to add scales inside the fish and how to complete a full underwater scene with an ocean bottom, plants, starfish, crabs and bubbles in the water.

Next, we created the ocean with a large brush, lots of water and blue watercolor paint. With a small, detail brush, we added shimmering colors of tempera paint for each detail in the scene. Finally, when all the paintings were complete, we shared a sparkling sticker with every fish and friend in class!

Here are some examples of our underwater scenes. To see all of our work, click on this link for artsonia. com and scroll down to the Kindergarten exhibit.  http://www.artsonia.com/schools/school.asp?id=114839

Artwork by Joy
Artwork by Alexa

Artwork by Benjamin

Artwork by Tyler


Note to families...
This art blog will be updated regularly with new posts sharing our daily activities in the art room and news about upcoming art exhibits. To respect the privacy of our students, names will always be limited to first name only and identifiable photos will never be accompanied with a name. If you have any questions or comments, please feel free to write in the comment box below or send me an email at blevine@ranneyschool.org. I would love to hear from you!
    In my class, students are given the chance to explore different materials and fun new techniques as they develop their signature style. Some young artists love to draw with a pencil, some like to paint on canvas or create images in a digital format, while others prefer working with clay and molding three-dimensional forms. In my classroom, we use a variety of materials allowing all artists to experiment and figure out which type of art they like the best. At Ranney School, we place a strong emphasis on originality and celebrate artistic differences, always nurturing and encouraging the imagination of every student.
     Remember to check out our display of finished artwork and student portfolios in the Ranney home page of Artsonia.com.  http://www.artsonia.com/schools/school.asp?id=114839


Thursday, February 5, 2015

FIFTH GRADE . . . A month of celebrations!

Fifth graders worked on a few fun sketches for the month of January, including a bright and colorful design in celebration of the New Year. We saw 2015 decorated with streamers, bright colors, symbols of a party, and clever illusions where the artist turned the numbers into pictures of other things.

Sketch by Kayla
Sketch by Alexa

Sketch by Cynthia


We also shared amazing drawings of Dr. Martin Luther King Jr. as we honored him with a postage stamp design. Not everyone drew a portrait of Dr. King, some drew symbols or messages of equality. Which drawing do you think would make a good stamp design?

Sketch by Anthony

Sketch by Sophia Z.

Sketch by Reese

Sketch by Sophia A.


Sketch by Christopher


Celebrating Mrs. Levine's favorite artist, we tried our hands at drawing just like Vincent van Gogh. Did you know that van Gogh sketched just the way he painted? He drew with short repetitive strokes, showing direction and movement on the page. Here are some of my students' interpretations of his work. Beautiful drawings!

Sketch by Lily
Sketch by Ross
Sketch by Melanie


Please add your comments below. Our 5th grade artists would love to hear from you!


Wednesday, February 4, 2015

SECOND GRADE . . . The arrangement of a still life

Paul Cezanne (1839-1906) is a famous Post Impressionist artist from France. He often focused on the arrangements in a still life as his choice of subject matter. Cezanne studied the shapes and angles of his arrangements to create a dynamic composition. Can you see any shapes in this painting, "Apples and Oranges," by Paul Cezanne? His work influenced artists such as Pablo Picasso and he was considered by many to be the father of modern art.
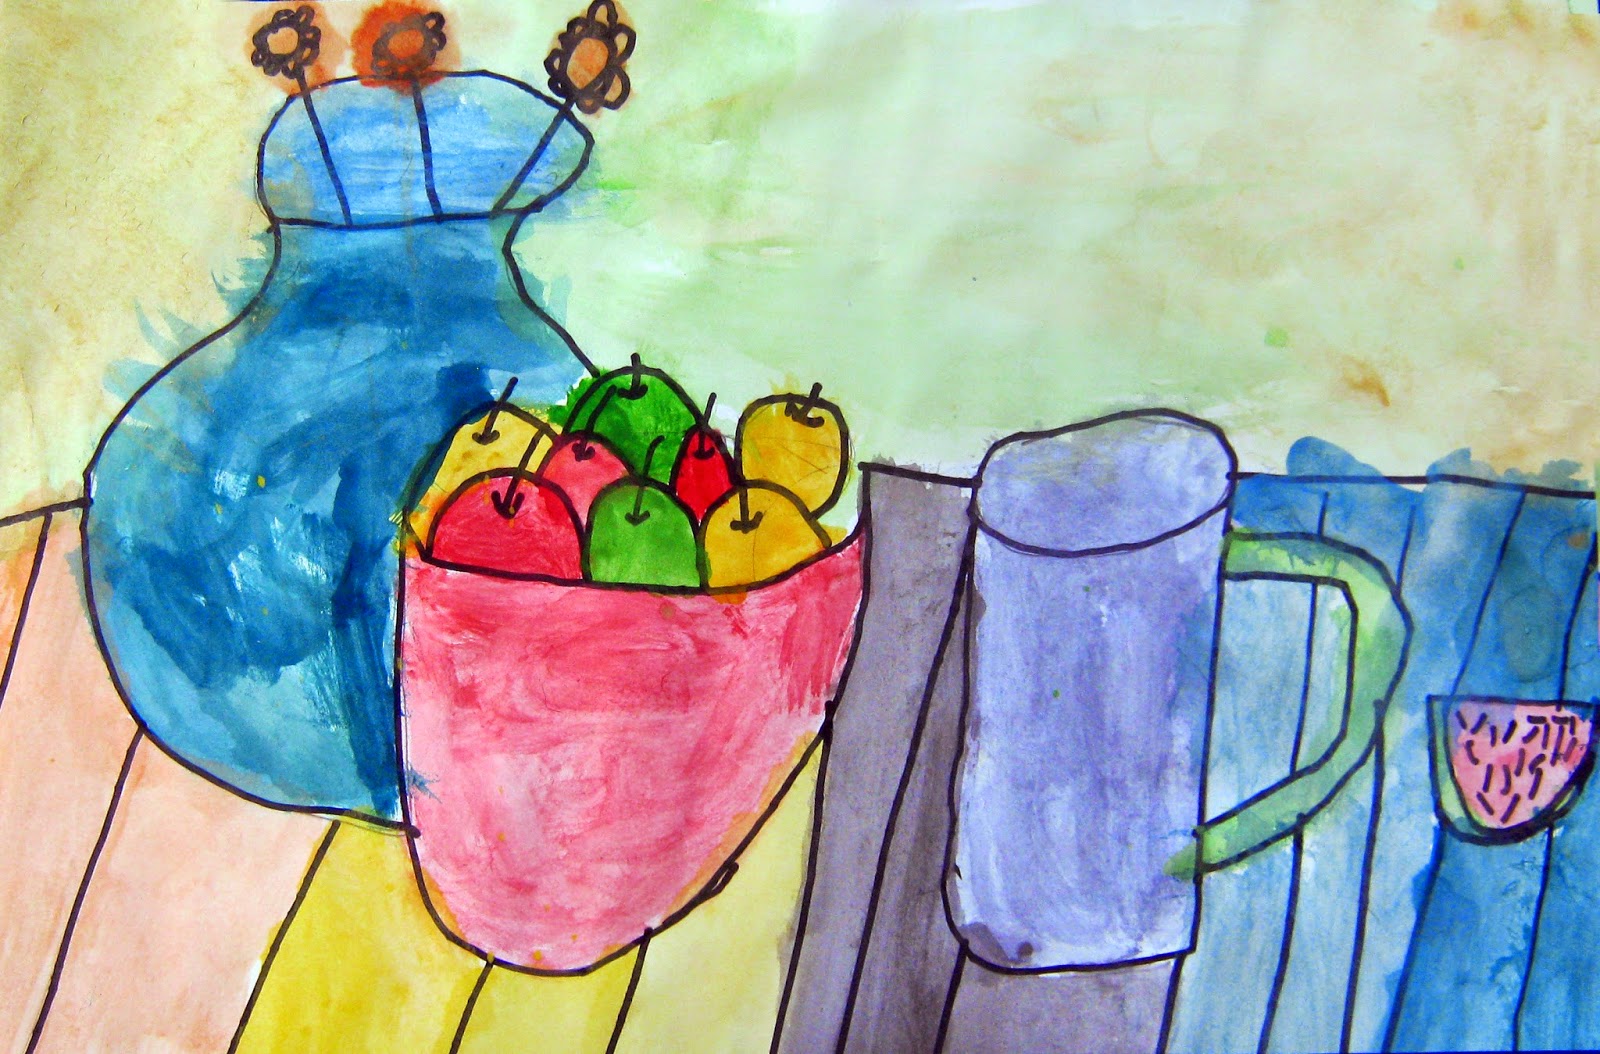
     The composition of a still life is the most important thing to consider. Objects are arranged on a table top to create interest, to highlight color, and to create a sense of movement across the page. When we began our still life drawings, we learned how to create a composition with overlapping shapes. When objects overlap, it is important to understand which one goes in front. We learned that the object or figure lowest on the page should be the one in the front.


Every round object we created began with a circle or an oval. The top of a vase or a bowl looks like a circle when you look straight down at the object, but when it is place on an table and you see it from a distance, the top circle appears more as an oval. Even the bottom line of the vase appears to have the same curve as the oval at the top. Understanding how to represent a round object on paper helps us to better see the form.


Once we drew all our objects in an interesting overlapping arrangement and added in details, such as fruit, a table cloth and a background, we used watercolors and a fine detail brush to add color.

Here are a few wonderful examples of our still life paintings. You can see everyone's work by following this link to artsonia.com.
http://www.artsonia.com/schools/school.asp?id=114839

Artwork by Layla
Artwork by Ethan S.

Artwork by Lynna

Artwork by Anthony


Note to families . . .
    This art blog will be updated regularly with new posts sharing our daily activities in the art room and news about upcoming art exhibits. To respect the privacy of our students, names will always be limited to first name only and identifiable photos will never be accompanied with a name. If you have any questions or comments, please feel free to write in the comment box below or send me an email at blevine@ranneyschool.org. I would love to hear from you!
    In my class, students are given the chance to explore different materials and fun new techniques as they develop their signature style. Some young artists love to draw with a pencil, some like to paint on canvas or create images in a digital format, while others prefer working with clay and molding three-dimensional forms. In my classroom, we use a variety of materials allowing all artists to experiment and figure out which type of art they like the best. At Ranney School, we place a strong emphasis on originality and celebrate artistic differences, always nurturing and encouraging the imagination of every student.
     Remember to check out our display of finished artwork and student portfolios in the Ranney home page of Artsonia.com.  http://www.artsonia.com/schools/school.asp?id=114839

Tuesday, February 3, 2015

FOURTH GRADE... Creating a Mandala with the letters of our names!


Fourth graders created a colorful circle design based on the art of the Mandala. Our designs were created out of the letters of our names. The repetition of colors and shapes around the circle are all created out of letters and the spaces between the lettering.

The word, "Mandala," is from the classical Indian language of Sanskrit. Loosely translated, it means "circle." It represents wholeness and appears in all aspects of life: the celestial circles we call the earth, sun and moon, as well as the conceptual circles of friends, family and community.

In ancient Tibet, as part of a spiritual practice, intricate mandalas were created out of colored sand and crushed stones. The designs in a mandala repeat as they rotate around the circle and any symbols used in the design must be perfectly reproduced each time within the circle. Rowan J. in one of our fourth grade classes recognized one of the symbols used in this mandala. He said it is the symbol "ar" that is used for Tibetan meditation. How wonderful that we can learn about so many different cultures right in our own classroom. Thank you Rowan!

The American Navajo also created sand paintings used in spiritual rituals, much the same way as they are used by the Tibetans. These designs could range in size from 3-15 feet but only last about a week, depending on the weather and wind conditions.

To create our mandalas, we started with a shape that looks like a slice of pie. It is 1/6th of the full circle. In this shape, we drew the letters of our name either in bubble letters or with straight lines. Then we used a light box in my room to trace our single name design into the full circle, repeating the letters as they rotate around the circle. Just as we did with our last project, we also used a mirror image repetition to make it reflect and add symmetry to the design.

Here are some examples of our name mandalas. Can you find the names hidden in these designs? Some of the students shortened their names or used a nickname for their design. To see all of our mandalas, click on this link for Artsonia and scroll down to the fourth grade exhibit.
http://www.artsonia.com/schools/school.asp?id=114839

Artwork by Nehemiah (Neo)
Artwork by Ava

Artwork by Charlie (Chuck)
Artwork by Colette (CeCe)